Back in August, I took a Customer Success role at Sensu. I’d been familiar with Sensu through my various bits of tinkering and dabbling with monitoring in the past, and was happy to take the role and work with the Sensu team officially.
Now that I’ve been working with Sensu for a few months (and am officially on paternity leave for the next several weeks), I decided it was time to revisit the idea of using Sensu to monitor my Kegpi’s various sensors. I’d hit some blocks previously, but came back to it with some fresh eyes. Lo and behold, I’ve got it working! Let’s walk through how I’ve got it running.
The Setup
Here are the prerequisites for getting Sensu to work on your Raspberry Pi:
- Ruby > 2.0
- Rubygems
sudo apt-get install ruby ruby-dev(this should install rubygems by default) - Sensu gem
sudo gem install sensu - A working Sensu server (you can snag one quick by downloading Vagrant, cloning my “Sensu Up and Running” repo, and doing a
vagrant up)
Configuration
Before you get started, ensure you’ve added the sensu user:
useradd sensu
Sensu
By default, the Sensu gem installs three services: sensu-client, sensu-server, and sensu-api. These form the core components of any Sensu installation, but we’re ultimately about getting a client up and running on the Raspi. Before we go too much futher into configuring Sensu, I recommend that if you’re not familiar with Sensu as a monitoring framework, you should take a moment and watch some of Sensu’s free training videos.
Presuming you’ve already installed the gem, the commands to manage the Sensu client are located in /usr/local/bin. The configuration files, however, are located in /etc/sensu/conf.d. You’ll likely have to create that directory:
sudo mkdir -p /etc/sensu/conf.d
From there, we’ll add three different configuration files, as per the Sensu Documentation:
client.jsonrabbitmq.json
Here’s what they’ll look like:
client.json:
{
 "client": {
   "environment": "development",
   "subscriptions": [
     "dev"
   ]
 }
}
rabbitmq.json
{
  "rabbitmq": {
    "host": "127.0.0.1",
    "port": 5672,
    "vhost": "/sensu",
    "user": "sensu",
    "password": "secret",
    "heartbeat": 30,
    "prefetch": 50
  }
}
Finish off by ensuring the permissions for all the files in /etc/sensu/ are owned by sensu:
* chown sensu. /etc/sensu/
NOTE: The credentials listed above should be changed. They’re merely examples pulled straight from the Sensu documentation and should NOT be used as is on any system you care about. You’ll also need to chage the IP addresses for Rabbit to the IP of the system(s) you have those running on. If you’re using the Sensu Up and Running Vagrant box, the IP addresses will be the same.
Systemd
If you’re used to a system using systemd for service management, you’ll be familiar with the service files located in /etc/systemd/system. Sensu includes service files for each of the components, but for them to work on a Raspberry Pi, they need to be slightly modified. You’ll need to create the service file like so:
sudo vim /etc/systemd/system/sensu-client.service
With the following content:
[Unit]
Description=sensu client

[Service]
User=sensu
Group=sensu
ExecStart=/usr/local/bin/sensu-client
KillMode=process
Restart=on-failure
RestartSec=1min

[Install]
WantedBy=multi-user.target
From there, start the service:
sudo systemctl start sensu-client
And set it to start at boot:
sudo systemctl enable sensu-client
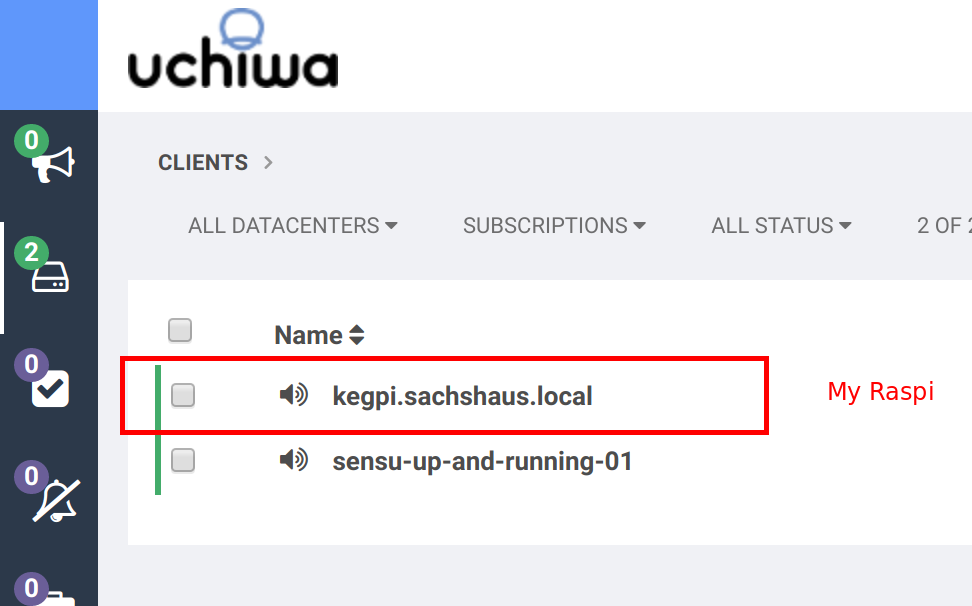
Which, if you’re using the Sensu Up and Running repo I mentioned earlier, should get you something that looks like this:
Next Steps
So what do you do after getting Sensu working on your Raspi? Well, it’s up to you! In my case, I’ll use it to monitor the temperature, whether or not the door is open, and remaining liquid in the kegs for my kegerator.
In your case, you may want to monitor some system-level activity, like load, available RAM, or something of the like. You could also use it to say, monitor a web app you’re running on the Raspi, or, since Sensu’s plugins can be written in any programming language, use it to monitor any number of sensors you can attach to the Pi. Again, if you haven’t already, take a look over Sensu’s training videos to get a better idea of how Sensu works and what you can do with it.